This article explains how to set up your MXGuardian Email account on an Android-based smartphone. For demonstration purposes, we will be using a fictitious email account: martha@quiltdesigns.com. Please use your actual email address and password in place of this one.
Note: These instructions are only for MXGuardian Hosted Email. If you are using MXGuardian Email Security with your own hosting, you do not need to make any changes to your Android settings.
- Open the Android Mail App and go to Settings
- Select “Add Account“
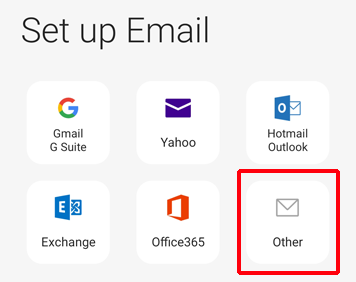
- Select “Other“
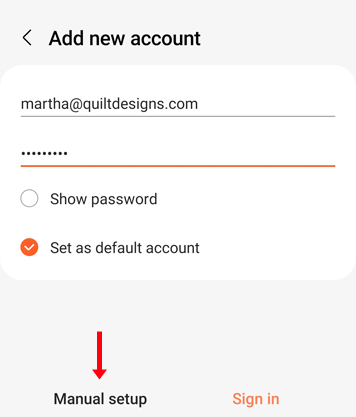
- Enter your email address and password
- Select “Set as default account” and click “Manual Setup“
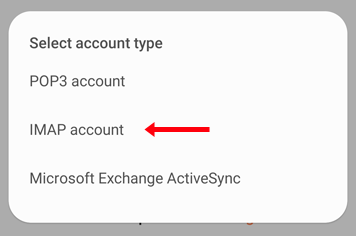
- Select “IMAP account” as the account type
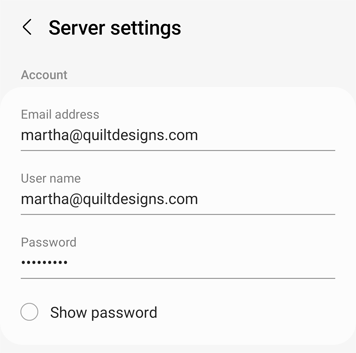
- Under “Account”, the Email address, User name, and Password fields should already be filled in.
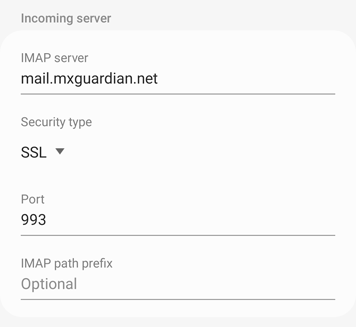
- Scroll down to “Incoming server”:
- Enter “mail.mxguardian.net” as the IMAP server name
- Under “Security type”, select “SSL“
- Under “Port” enter “993“
- Leave the “IMAP path prefix” blank
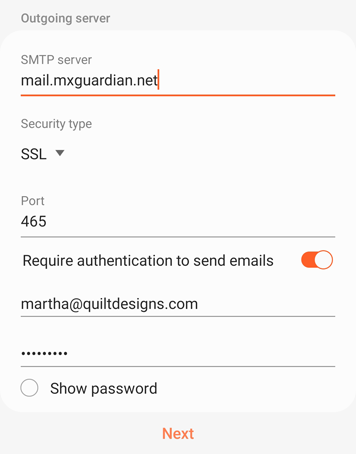
- Scroll down to “Outgoing server”:
- Enter “mail.mxguardian.net” as the SMTP server name
- Under “Security type”, select “SSL“
- Under “Port” enter “465
- Make sure that “Require authentication to send emails” is enabled
- Fill in your email address and password if they are not already filled in
- Click Next
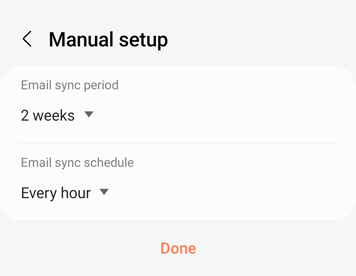
- Select the desired options for “Email sync period” and “Email sync schedule” and click “Done“
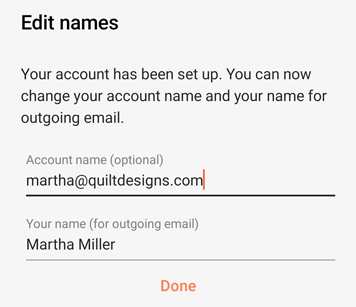
- Enter your name as you would like it to appear and click “Done“
At this point your email account has been configured.