This article explains how to set up your MXGuardian Hosted Email account on a iOS-based device such as an iPhone or iPad. For demonstration purposes, we will be using a fictitious email account: martha@quiltdesigns.com. Please use your actual email address and password in place of this one.
Note: These instructions are only for MXGuardian Hosted Email. If you are using MXGuardian Email Security with your own hosting, you do not need to make any changes to your iOS settings.
Option 1: Automatic Set Up
This option is the easiest method and will configure your mail, calendar and contacts to sync with the MXGuardian server.
- Open the Safari web browser on your iPhone or iPad.
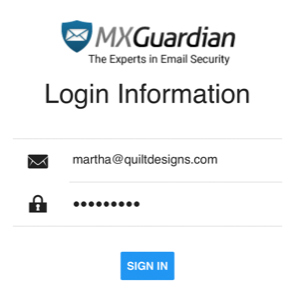
- Go to this URL: https://webmail.mxguardian.net
- Enter your email address and password and click “Sign In“
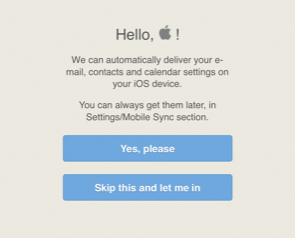
- You will be prompted to download a configuration profile. Click “Yes Please“
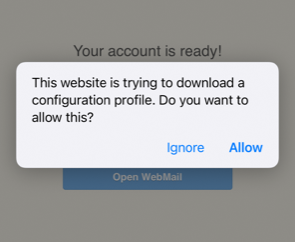
- At the prompt, click “Allow“
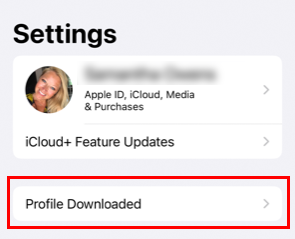
- After the profile has finished downloading, return to your home screen and open the Settings app
- Click on “Profile Downloaded“
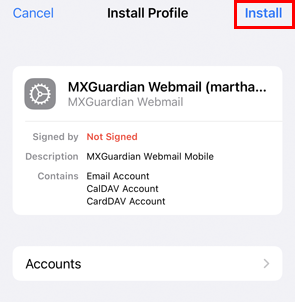
- Click “Install” in the to right corner
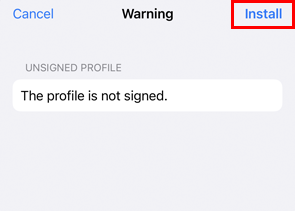
- If you receive a warning that the profile is not signed, click “Install“
- Click “Done“
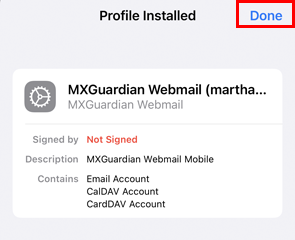
At this point your email, contacts, and calendar should be set up to sync with the MXGuardian server.
Option 2: Manual Set Up
Only use this option if the automatic set up option doesn’t work. We will break the procedure down into 3 parts:
- Configure Email using IMAP
- Configure Calendar Synchronization using CalDAV
- Configure Contact Synchronization using CardDAV
Manual Setup Part 1: Configure Email using IMAP
- On your iOS device, open the Settings app
- Select “Mail“, On older devices it may be listed as “Mail, Contacts, Calendars“

- Under “Accounts”, select “Add Account“

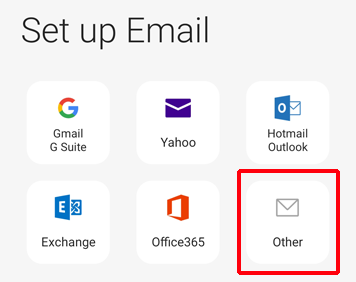
- Select “Other“

- Under “Mail”, select “Add Mail Account“

- Fill in your name, email address and password. (Note: the “Description” field is optional and can be anything you want)

- Click “Next“
- On the following screen, make sure “IMAP” is selected at the top
- Under “Incoming Mail Server”:
- For “Host Name”, enter “mail.mxguardian.net“
- For “User Name”, enter your full email address
- For “Password”, enter your email password
- Under “Outgoing Mail Server”, enter the same information again:
- For “Host Name”, enter “mail.mxguardian.net“
- For “User Name”, enter your full email address
- For “Password”, enter your email password

- Click “Next“. It may take a few seconds for the settings to be verified.
- Make sure the “Mail” slider is enabled and all other sliders are disabled.

- Click “Save”
At this point your email account is set up. Open the Mail app to view your email.
Manual Setup Part 2: Configure Calendar Synchronization
- On your iOS device, open the Settings app
- Select “Calendar“, On older devices it may be listed as “Mail, Contacts, Calendars“

- Under “Accounts”, select “Add Account“
- Select “Other“
- Under “Calendars”, select “Add CalDAV Account“

- Fill in the following information
- For “Server”, enter “dav.mxguardian.net“
- For “User Name”, enter your full email address
- For “Password”, enter your email password
- For “Description”, enter anything you want

- Click “Next“. Wait a few seconds for the settings to be verified.
- Click “Save“

- Go back to the calendar settings screen

- Select “Default Calendar“

- Select “My Calendar” to make the new calendar your default

Your calendar is now set up to synchronize with the server. Open the Calendar app to view your appointments.
Manual Setup Part 3: Configure Contact Synchronization using CardDAV
- On your iOS device, open the Settings app
- Select “Contacts“, On older devices it may be listed as “Mail, Contacts, Calendars“

- Select “Accounts”, then select “Add Account”
- Select “Other”
- Under “Contacts“, select “Add CardDAV Account“

- Fill in the following information
- For “Server”, enter “dav.mxguardian.net“
- For “User Name”, enter your full email address
- For “Password”, enter your email password
- For “Description”, enter anything you want

- Click “Next“. Wait a few seconds for the settings to validate.
Your contacts are now set up to synchronize with the server.